


Adding Pentair’s New GRO Encapsulated Membrane to Your RO Unit
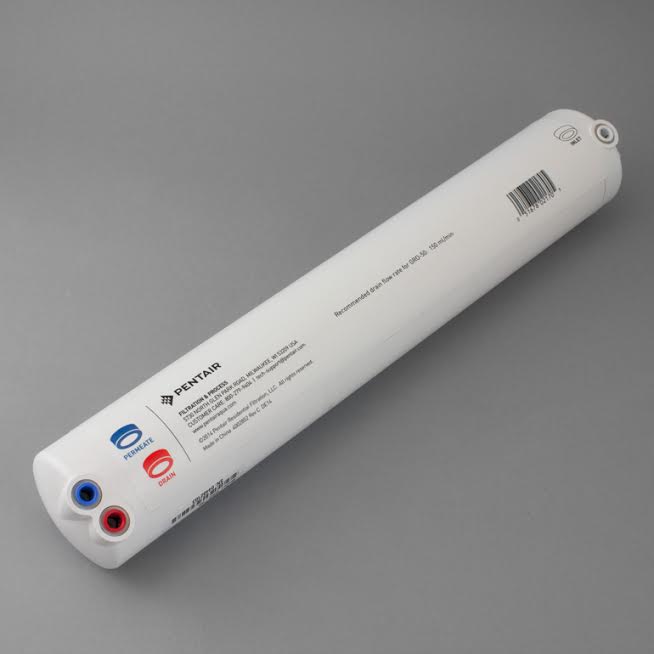
The GRO membrane has color-coded ports that make installation easy. (Click picture for a larger view.)
The new membrane is “encapsulated.” This means that it doesn’t have a permanent housing that contains a removable membrane element. It is a membrane and a housing in one piece. To add this membrane to an existing RO unit, you’ll be throwing away your current membrane housing and replacing it with the GRO. Any elbow fittings that attach tubes to your current membrane will also be discarded.
Your current membrane housing has three tubing ports–two on one end, one on the other. The single port is where water enters the membrane housing after it leaves your prefilter. Inside the membrane housing the water is split into two streams and these leave by their separate ports on the other end of the housing. One is called permeate. This is the water you’re going to drink. The second is called brine. This is the reject water that’s going to the undersink drain pipe. In most cases the permeate port will be the one nearest the center of the membrane housing and the brine port will be the one that’s offset to the side a bit. The brine port may be to the left or to the right of the permeate port.
To replace your current membrane with the new GRO, begin by identifying (with a tag if necessary) the three tubes going into your current membrane housing: Tap water inlet (on the end that has only one tube), premeate (the product water leaving the membrane through the center-most fitting), and brine (the offset tube that goes to the drain.
To install the new membrane, just connect the tubes from your RO unit to the appropriate ports on the new membrane. The Tap Water Inlet tube goes into the white port on the GRO; the Permeate tube goes into the blue port; the Brine tube goes into the red port. You’ll have to insert an inline check valve into the Permeate tube. Be sure it points toward the auto shutoff valve. You’ll also have to insert the appropriate flow restrictor into the Brine tube. Be sure it points away from the membrane toward the undersink drain connection.
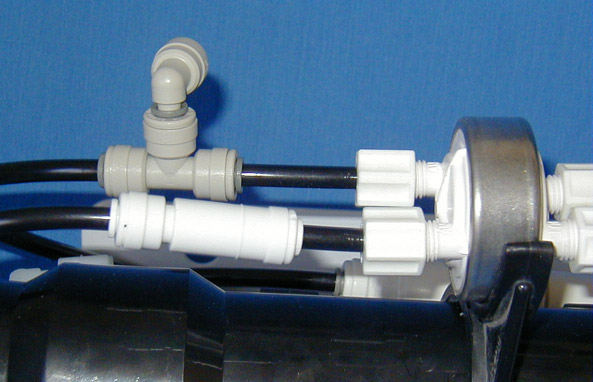
Check valve goes between the blue port of the membrane and the auto shutoff valve.
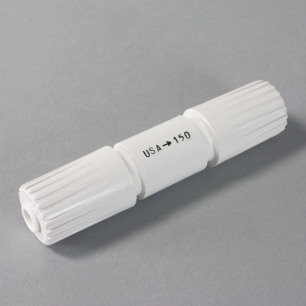
The flow restrictor is inserted into the drain line. Note directional flow arrow. The 150 ml flow restrictor shown above is for the GRO 50 gpd membrane.
If you’re lucky, the tubes from your old membrane will be long enough to plug into your new membrane. If tubes are too short, replace them. A crimped tube will eventually leak. Things you might need for the job are extra tubing and some plug in elbows.
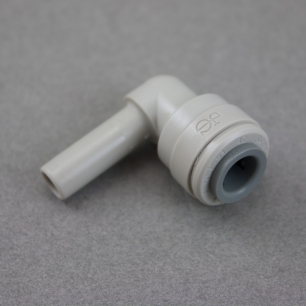
A plug-in elbow makes tube connection easy with the GRO membrane. Plug the stem into the membrane port and plug the tube into the quick connect port of the fitting. The result is a swivelling elbow that’s ideal for your installation.
The membrane manufacturer recommends a 24-hour rinse before using the water. Most users don’t rinse this long. Keep in mind that RO membranes are packed in preseratives, so you’ll want to rinse the unit thoroughly before using the water. We suggest allowing the RO unit to run with the faucet open for at least an hour before closing the faucet and capturing water in the storage tank. Then, when the tank is full, open the faucet, dump the water from the tank, then allow the tank to refill before you use the water.
Please call if there are questions: Pure Water Products, 940-382-3814.

