


Installing Your Reverse Osmosis Membrane, or Replacing Your Existing Membrane
This article shows how to install a new membrane.
To replace an existing membrane —
1. Turn off the inlet water, turn off the storage tank valve, and open the faucet. If no water is coming out of the faucet, you can open the membrane housing.
2.To remove the membrane, remove the tube from the fitting on the cap end of the horizontally installed membrane housing. The cap is on the end of the housing that has only one tube. Screw off the cap. (Putting a towel or a pan under the RO unit is a good idea because water will run out of the membrane housing when the cap is removed.) When the cap is off, remove the membrane from the housing by pulling on the stem.
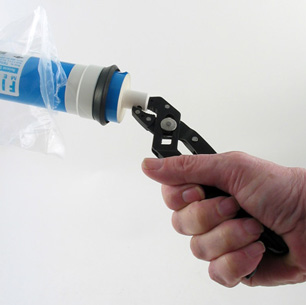
3. The new membrane is packed with preservatives, so be careful when you remove it from its protective wrapper. It is best to avoid touching the membrane with your hands. Wear gloves or use pliers, as in the picture. Insert the new membrane (o ring end first) into the housing and push it in until it slides into the slot at the end of the housing. Twist the stem and push inward to make sure it is seated in its slot.
4. Replace the cap, reinsert the tube into the cap, and turn on the inlet water. (Leave the tank valve off and the faucet open.)
5. Let the water run from the faucet for at least two hours to rinse the new membrane, then open the tank valve, close the faucet and let the new membrane fill the tank.

